The system configuration is used to put together the application by (re)using building blocks such as components as well as behavior models. Thereby only the outer view on the hull (services) as well as the explicated configurations of the components are presented in the model [4].
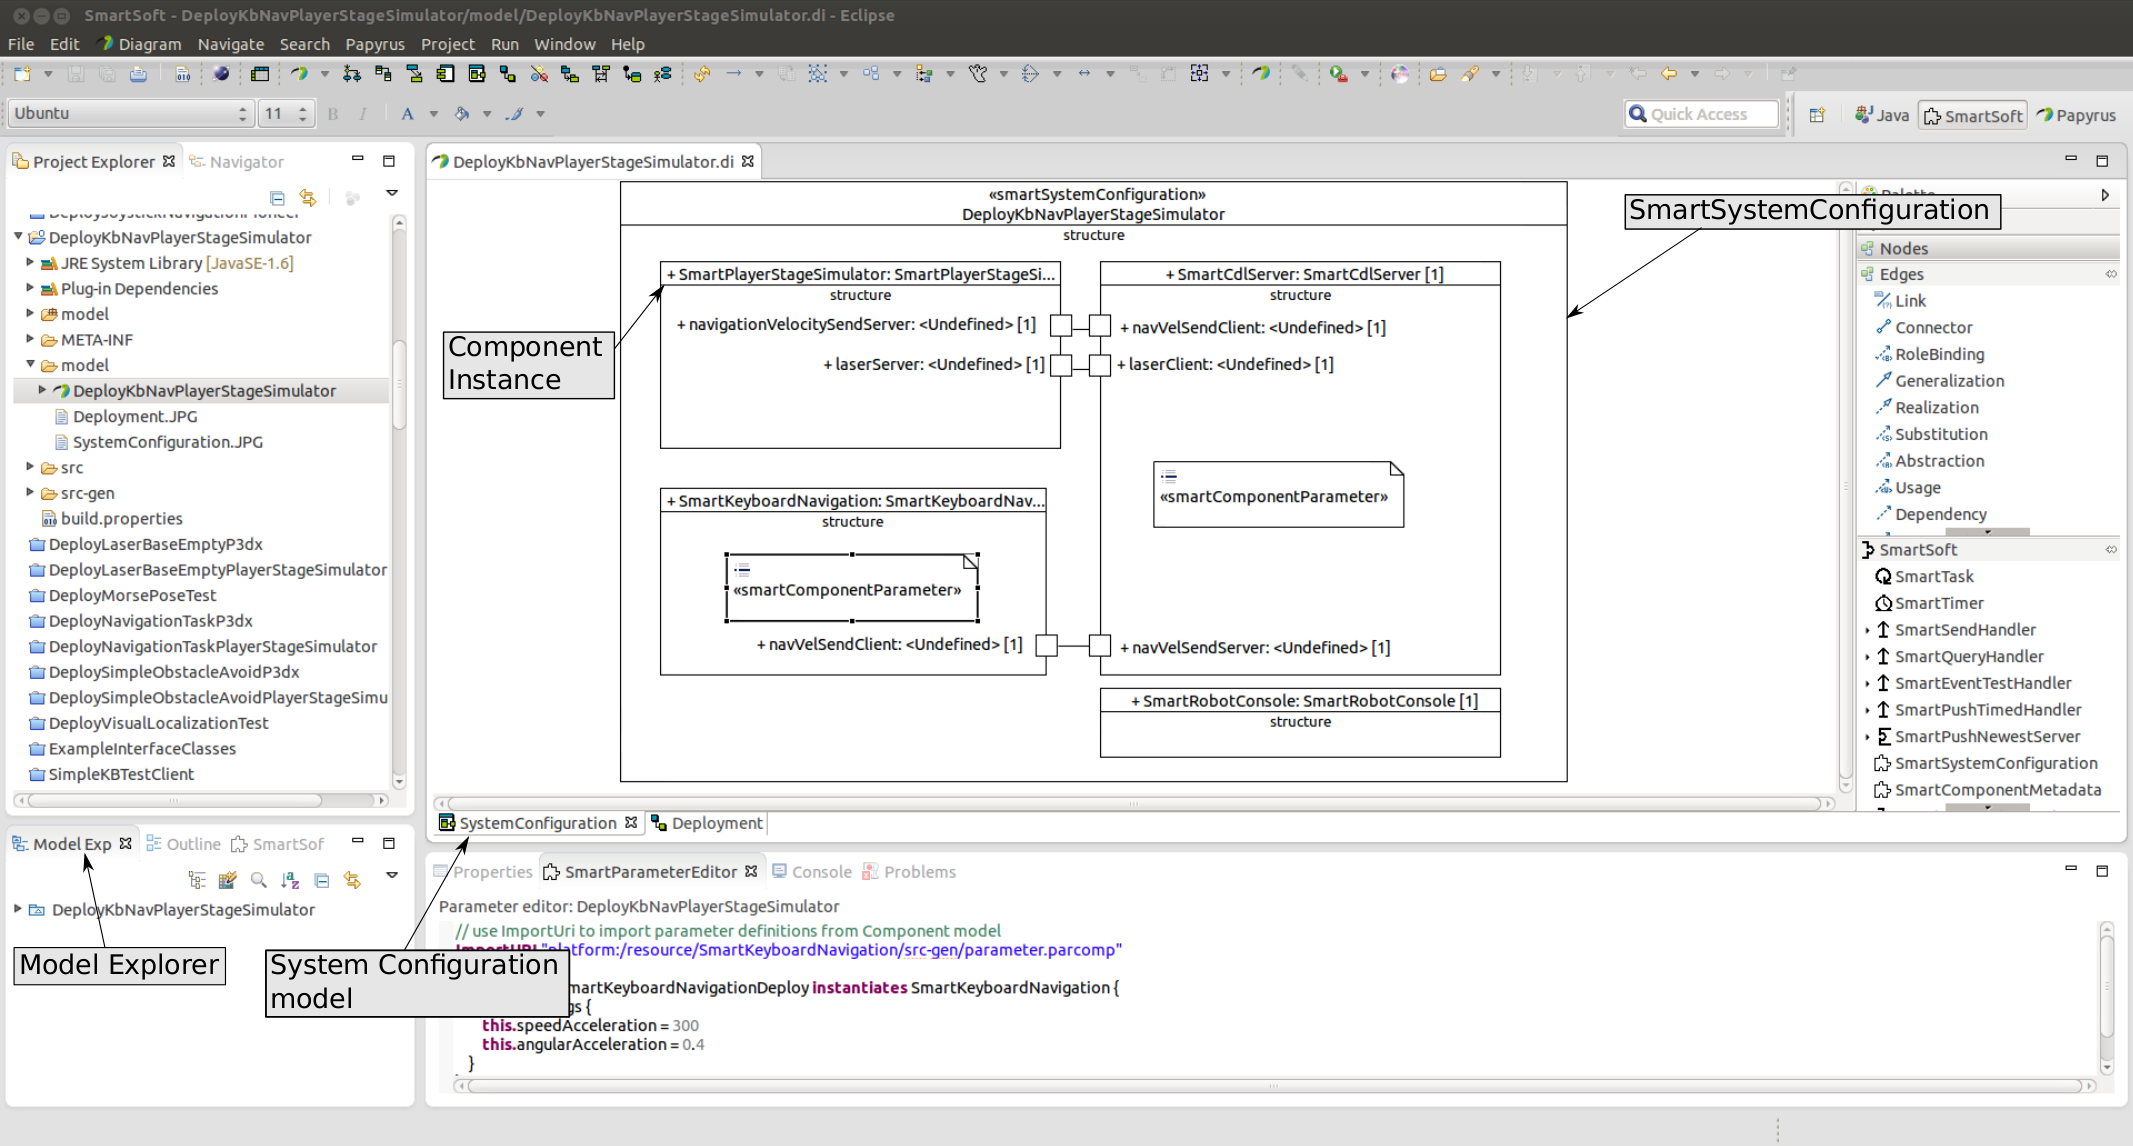
The system configuration model is part of the system composition project and is located in the model-folder.
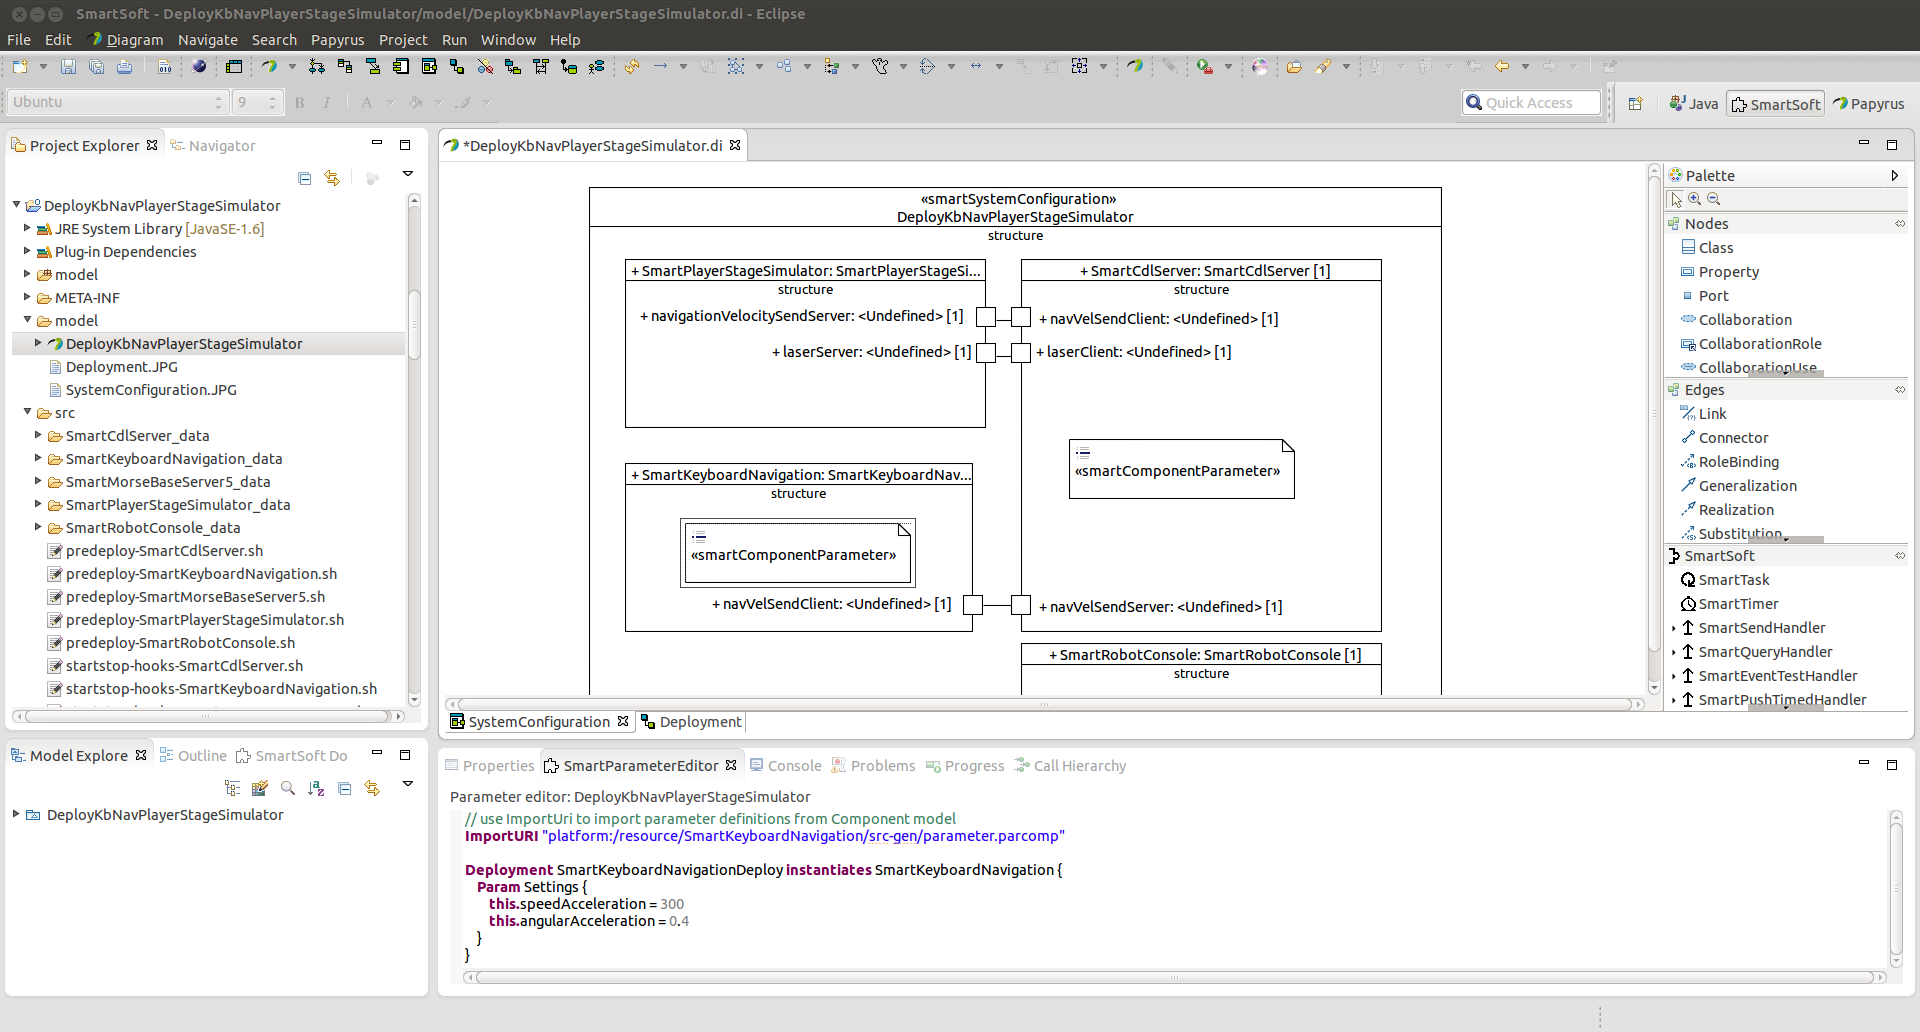
The system configuration is modeled graphically. It consists of a SmartSystemConfiguration which contains all building blocks. The name of the SmartSystemConfiguration must match the name of the System Composition Project. In order to model component instances inside the system configuration the components have to be imported. To do so, right click on the system configuration model and choose "Import Components". The imported components are then listed in the model explorer and can be added to the model via drag and drop. The name of the component instances can be changed in the properties tab. After the component instance is added to the model no services are displayed. To show/hide the border items right click on the component instance and select "Filters"->"Show/Hide Contents". Visible services can then be connected with a connector.
Figure 2.28 illustrates the modeling of the system configuration with the SmartMDSD Toolchain.
Existing connections between two component instances can be changed by selecting the connector element. The connection can then be altered through dragging the end of the connection to the new communication port.
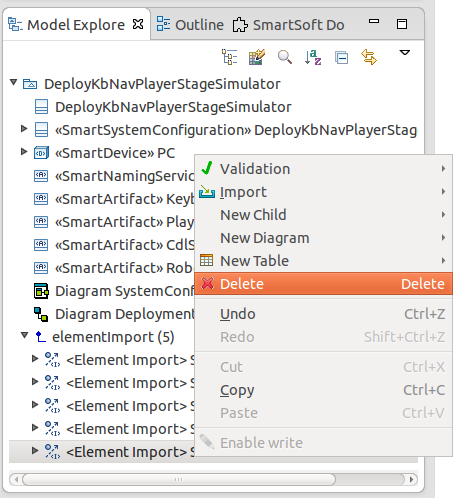
If a component should be deleted from the model all instances must be removed (right click on the instance and choose "Delete Selected Element"). Then the imported component must be deleted in the model explorer (right click on the imported element and choose "Delete").
Additionally the component has to be deleted from the Java Build Path. To do so, right click on the system composition project and select "Properties". On the left hand side tree of the upcoming dialog box select Java Build Path and switch to the "Projects" tab. The project can then be deleted by selecting the project and pressing the "Remove" button. Figure 2.30 shows the dialog box.

To set the parameters of a component instance a SmartComponentParameter element has to be added to the model of the instance. The parameter is then set as follows:
	ImportUri <path>

	Deployment <instance name>Deploy instantiates <component name> {
		Param <name> {
			this.<attribute name> = <value>
		}
	}
Parameters are set with the keyword 'Param' followed by the name of the parameter and the attributes which are enclosed by curly braces. The attributes which should be assigned with a value are selected with the this-operator.